Passive Liveness Detection
Note: Please ensure that you have completed the Get Started section before diving into and attempting to make use of any of the below features.
The web SDK provides two different ways of integrating passive liveness functionality into your project.
You can either use our pre-built components which can be configured and styled for your needs, or you can completely build the UI yourself and make use of our JavaScript API to integrate with our liveness functionality.
Components
The following components are available:
Passive Component
This component can be found under the Sybrin.Biometrics namespace and is called PassiveComponent.
Full name: Sybrin.Biometrics.PassiveComponent.
It is a component that wraps the passive liveness detection functionality provided by the Sybrin Biometrics JavaScript API and presents it in the form of a simple UI. It's recommended that you use this component if you do not wish to create your own UI and simply want to use the passive liveness functionality provided by the Sybrin Biometrics Web SDK.
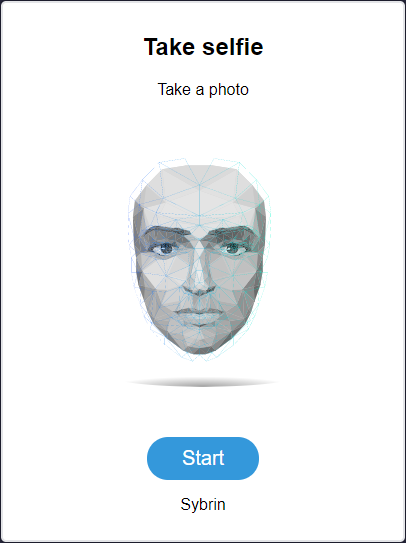
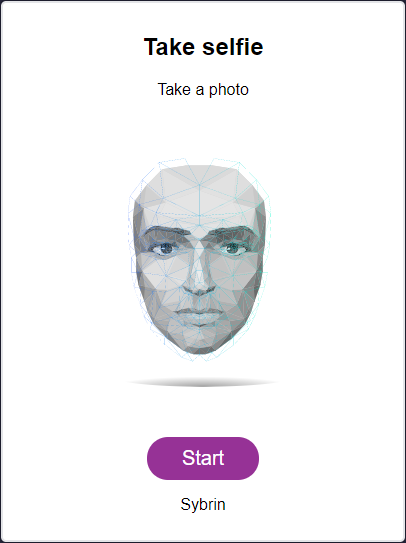
With default styling, the passive component appears as follows:
Upon clicking "Start", the user will be prompted with instructions on how to take a viable selfie. Upon proceeding, the user's camera will initialize and the component will display a video feed while waiting for the user to center their face inside the oval. This action can be cancelled, resulting in the onLivenessCancelled event firing.
If an error occurs, the onLivenessError event will fire.
If liveness detection completes, the onLivenessResult event will fire.
Initialization
The passive component can be initialized using the following code:
The Sybrin Web SDK provides the option to either pass down the ID of the element you wish to use for component initialization, or to pass the element directly.
Please note that 'passive' is just an example in this context and the ID may be changed as desired as long as it matches the value passed down during component initialization in JavaScript.
During initialization, the passive component allows for a number of configuration options that may be passed down using an object literal. The parameters that may be used on the object include the following:
Required:
id (string): ID of the element you wish to use for component initialization. Not required ifelementis passed.element (HTMLElement): Element you wish to use for component initialization. Not required ifidis passed.api (Sybrin.Biometrics.Api): Instance of a JavaScript API that may be pre-configured as desired. Not required if an instance ofoptionsis passed.options (Sybrin.Biometrics.Options): Configuration options to instantiateSybrin.Biometrics.Apiwith. Not required if an instance ofapiis passed.
Optional:
correlationId (string): Unique identifier for the case that will be passed down to the back-end if set.useModal (boolean): Whether or not to pop the video feed out into a modal. By default, this is true.
For altering component text or implementing localization if required:
headingText (string): Text to display in the heading. Default "Take selfie"subtitleText (string): Text to display in the subtitle. Default "Take a photo"perfectSelfieText (string): Prompt to display above selfie instructions. Default "Guidelines to the perfect selfie"startButtonText (string): Text to display in the start button. Default "Start"gotitButtonText (string): Text to display in the proceed button of the instructions screen. Default "Got it!"cancelButtonText (string): Text to display in the cancel button. Default "Cancel"companyText (string): Company text to display at the foot of the component. Default "Sybrin"cameraAccessInstructionText (string): Instruction text stating to allow camera access. Default "Allow camera access when prompted"lightingInstructionText (string): Instruction text stating to ensure proper lighting conditions. Default "Ensure good lighting with no bright lights in background"accessoriesInstructionText (string): Instruction text stating to remove facial and/or topical accessories. Default "Remove hats, sunglasses and headsets"alignmentInstructionText (string): Instruction text stating to ensure correct alignment. Default "Ensure correct alignment"facePositionInstructionText (string): Instruction text stating to ensure face is positioned in frame. Default "Position face in frame"faceAmountInstructionText (string): Instruction text stating to ensure that only one face is in the frame. Default "Only one face must be in frame"followInstructionText (string): Instruction text stating to follow the on-screen prompts. Default "Follow on-screen instructions"
Warning: Initialization will fail if the intended host element does not exist yet.
Always ensure that the initialize function is only called after the DOM is loaded.
Destruction
The passive component may be removed from the UI by calling the destroy() function on it.
Example:
Events
The passive component offers multiple events. To hook onto an event, simply assign a function to it.
The following options are available:
onLivenessResult(result: PassiveLivenessResult)onLivenessError(error: string)onLivenessCancelled()onBeforeWebcam()
On Liveness Result
This function is called when a liveness result is acquired without error and includes liveness true and false results. To hook onto the event, you may use the following code:
The result parameter is of type PassiveLivenessResult and includes the following properties:
alive (boolean): Whether or not the liveness detection passed.confidence (float): Confidence in liveness. 0 is no confidence. 1 is full confidence.
A false result may include a spoof, failure to detect a face due to poor image quality, or any other expected failed workflow outcomes. Only exceptions such as failure to gain access to the webcam would trigger the liveness error function below.
On Liveness Error
This function is called when something goes wrong and an error occurs during liveness detection. To hook onto the event, you may use the following code:
The error parameter is of type string.
On Liveness Cancelled
This function is called when liveness detection was started, but then cancelled before completion. To hook onto the event, you may use the following code:
No parameter is passed to this function call.
On Before Webcam
This function is called before the webcam is launched when passive liveness detection starts. It is recommended to use this function to set the correlationId of the component by calling setCorrelationId(). To hook onto the event, you may use the following code:
No parameter is passed to this function call.
Styling
The passive component is structured a follows:
The classes and elements specified above may be used to freely style the passive component as desired. To do so, simply create a stylesheet and include it in the project, then style according to the above classes and elements.
Depending on component state, visibility of certain div elements alternates.
When idle...
sybrin-biometrics-passive-imageis shownsybrin-biometrics-passive-videois hiddensybrin-biometrics-passive-startis shownsybrin-biometrics-passive-cancelis hidden
When running a liveness test...
sybrin-biometrics-passive-imageis hiddensybrin-biometrics-passive-videois shownsybrin-biometrics-passive-startis hiddensybrin-biometrics-passive-cancelis shown
Styling implementation example:
Result Component
This component can be found under the Sybrin.Biometrics namespace and is called ResultComponent.
Full name: Sybrin.Biometrics.ResultComponent.
It is a component that displays the result of a liveness detection provided by the Sybrin Biometrics JavaScript API and presents it in the form of a UI component. It's recommended that you use this component if you do not wish to create your own UI and simply want to display a result provided by a completion of the Sybrin Biometrics Web SDK liveness detection.
The liveness result may be obtained by either using an instance of the JavaScript API or by using a liveness detection component such as PassiveComponent to run a liveness test.
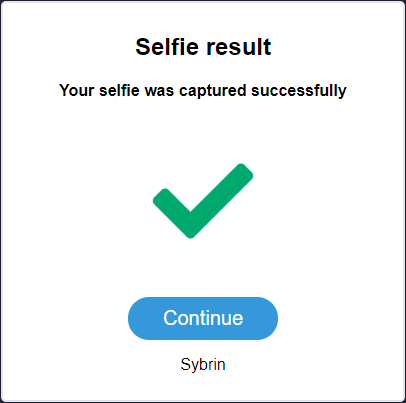
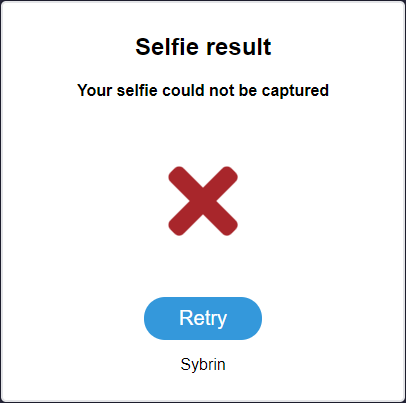
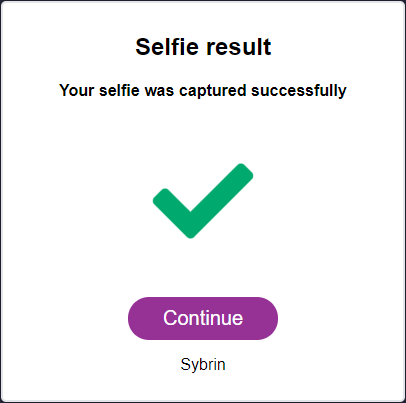
With default styling, the result component appears as follows:
Upon clicking "Continue", the onContinue event will fire.
Upon clicking "Retry", the onRetry event will fire.
Initialization
The result component can be initialized using the following code:
The Sybrin Web SDK provides the option to either pass down the ID of the element you wish to use for component initialization, or to pass the element directly.
Please note that 'result' is just an example in this context and the ID may be changed as desired as long as it matches the value passed down during component initialization in JavaScript.
During initialization, the result component allows for a number of configuration options that may be passed down using an object literal. The parameters that may be used on the object include the following:
Required:
id (string): ID of the element you wish to use for component initialization. Not required ifelementis passed.element (HTMLElement): Element you wish to use for component initialization. Not required ifidis passed.result (Sybrin.Biometrics.PassiveLivenessResult): TheSybrin.Biometrics.PassiveLivenessResultinstance to construct the UI with.
For altering component text or implementing localization if required:
headingText (string): Text to display in the heading. Default "Selfie result"subtitleSuccessText (string): Success text to display in the subtitle. Default "Your selfie was captured successfully"subtitleFailText (string): Fail text to display in the subtitle. Default "Your selfie could not be captured"continueButtonText (string): Text to display in the continue button. Default "Continue"retryButtonText (string): Text to display in the retry button. Default "Retry"companyText (string): Company text to display at the foot of the component. Default "Sybrin"
Warning: Initialization will fail if the intended host element does not exist yet.
Always ensure that the initialize function is only called once the DOM is loaded.
Destruction
The passive component may be removed from the UI by calling the "destroy()" function on it.
Example:
Events
The result component offers multiple events. To hook onto an event, simply assign a function to it.
The following options are available:
onContinue()onRetry()
On Continue
This function is called when the user clicks on the continue button. To hook onto the event, you may use the following code:
No parameter is passed to this function call.
On Retry
This function is called when the user clicks on the retry button. To hook onto the event, you may use the following code:
No parameter is passed to this function call.
Styling
The result component is structured a follows:
The classes and elements specified above may be used to freely style the result component as desired. To do so, simply create a stylesheet and include it in the project, then style according to the above classes and elements.
Depending on the alive state of the provided result, visibility of certain div elements alternates.
When alive is true...
sybrin-biometrics-result-continueis shownsybrin-biometrics-result-retryis hidden
When alive is false...
sybrin-biometrics-result-continueis hiddensybrin-biometrics-result-retryis shown
Styling implementation example:
JavaScript API
If you wish to use the functionality provided by the Sybrin Biometrics Web SDK but create your own UI entirely, you may achieve this by simply creating an instance of the JavaScript API and using the functions exposed by it.
Initialization
The JavaScript API may be initialized as follows:
The options object may be used to configure the API as desired.
Configuration Options
The following properties are exposed as configuration options:
Required
apiKey (string): Your API key as provided by Sybrin.authorizationEndpoint (string): The endpoint that will be used to authorize.passiveLivenessEndpoint (string): The endpoint that will be used to execute passive liveness detection.
Optional
videoInterval (integer): The interval (in milliseconds) at which the video stream is analyzed for faces during liveness detection. The default and minimum value is 500.mediaStreamStartTimeout (integer): The time (in milliseconds) that the SDK is given to enable and hook onto the user's webcam before it times out. The default value is 6000.modelPath (string): Path to the model used for UI-side facial detection. The default value is "assets".passiveLivenessModelNumber (string): The version number of the server-side model used for liveness detection. The default value is "7".passiveLivenessParamName (string): The parameter name of the image to run passive liveness detection on. The default value is "media".faceDetectionScoreThreshold (float): The UI-side threshold for facial detection confidence. The default value is 0.5.blurThreshold (number): The threshold that the blur detection algorithm must pass for the image to be considered clear enough. A higher value is more strict. A lower value is less strict. Default 5.0underexposedValue (number): The grayscale RGB value (0-255) that a pixel's color must be smaller than in order to be considered underexposed. Default 30.overexposedValue (number): The grayscale RGB value (0-255) that a pixel's color must be larger than in order to be considered overexposed. Default 220.underexposedThreshold (number): The percentage of underexposed pixels that should be present for an image to be considered underexposed. Default 40.overexposedThreshold (number): The percentage of overexposed pixels that should be present for an image to be considered overexposed. Default 50.faceDistanceThreshold (number): The distance threshold for the face to be considered close enough, where 0.9 is the closest and 0.1 is the furthest. Default 0.5.
Component text and localization
messageSuccess (string): Text prompt to display after a successful image capture. Default "Good job!"messagePreparing (string): Text prompt to display while initializing the video stream. Default "Preparing..."messageAlignment (string): Text prompt to display if a misaligned face is detected. Default "Please center face and open your eyes"messageDistance (string): Text prompt to display if the face is too far away. Default "Please move closer to the camera"messageNoFace (string): Text prompt to display while no face is detected. Default "No face detected"messageLightingDark (string): Text prompt to display when the video feed is underexposed. Default "Lighting conditions too dark"messageLightingBright (string): Text prompt to display when the video feed is overexposed. Default "Lighting conditions too bright"messageBlurry (string): Text prompt to display when the video feed is too blurred. Default "Image too blurry or requires more light"
Functionality
The Sybrin Biometrics Javascript API provides multiple ways of running liveness detection and other functions to control the Web SDK.
These include:
Run Liveness Using Webcam
Cancel
Additionally, the API provides:
Version Information Retrieval
Client Information Retrieval
Run Liveness Using Webcam
To use the webcam for passive liveness detection, you may make use of the openPassiveLivenessDetection function exposed by the JavaScript API.
Optionally, you may pass an object literal as a parameter and specify either id or element as a property.
If no parameter is passed, the Web SDK will temporarily inject a full screen element to display the video feed. If id (type string) or element (type HTMLElement) is passed, the Web SDK will create the video feed inside the passed element or element matching the passed ID.
You may also optionally pass a correlationId value to associate the result with a specific case.
The function returns a promise, so you may choose to use either the asynchronous await pattern or to subscribe to the result using .then(), .catch() and .finally().
Example:
Cancel
A function to cancel any action that the biometrics Web SDK is currently executing. This is useful if you wish to add a cancel button to the UI so that the user may stop liveness detection while it's in progress.
Example:
Version Information Retrieval
To get all version info regarding the Web SDK and its components, the API exposes a function called getVersionInfo.
Usage example:
The result has the following properties:
webSdkVersion (string): The semantic version number of the JavaScript web SDK that is currently in use.
Client Information Retrieval
To get all version info regarding the client environment in which the application is currently running, the API exposes a function called getClientInfo.
Usage example:
The result has the following properties:
isMobile (boolean): Whether or not the client environment is mobile (tablet or phone).
Demo Application
The code example can be downloaded by clicking the file link below
This is a code example that fully incorporates the Sybrin Biometrics Web SDK. To use the above example, please ensure the following:
You have an API key as provided by Sybrin
You have the backend API endpoints for authentication and liveness as provided by Sybrin
Then follow these steps:
Download the
sybrin-biometrics-websdk-demo-application.zipfile linked aboveExtract the zip file contents
Open index.js
In index.js, replace 'your-api-key-here' with the API key provided by Sybrin
In index.js, replace 'your-auth-endpoint-here' with your backend authorization API endpoint
In index.js, replace 'your-liveness-endpoint-here' with your backend liveness API endpoint
Host the folder in any hostable environment, e.g. IIS
Please remember to supply your API key and endpoints to the configuration options in index.js.
Last updated